Hey there! I hope you’re doing okay on that side of the screen!
In my previous posts, I talked about all the base Linux distributions and base kernels that exist. We also understood the concept of virtualization, and the types of hypervisors that exist.
As we’re accustomed to some of the basics of Linux by now. Let’s do some practical work today. In this article (and subsequent ones), I’ll teach you how you can install Linux on your Windows computers. In subsequent articles, I’ll include step-by-step instructions for all major systems, including mobile phones!
The Plan.
My `Install Linux` series will be in 3 parts.
In this part, I’ll start with the Windows exclusive software: WSL & Microsoft Hyper-V.
In the next one, I’ll tell you how to virtualize Linux using tools that work on both Windows & macOS, ie Oracle VirtualBox and VMware. I’ll also tell you about Parallels, which only works on macOS and is paid software.
In the final part, I’ll talk about how you can try Linux on mobile phones, namely Android & iPhones. It’s gonna be pretty fun to see what your mobile phones are capable of when running software like Termux & iSH!
I’ve chosen not to include dual boot optionsbecause:
Windows 11 enables encryption by default, which prevents you from turning off things like Secure Boot and Bitlocker Encryption. So, if you install Linux directly and disable Secure Boot in the process, Windows will just fail to boot.
By default, Linux doesn’t encrypt your partitions, which means the data on it will get compromised in-case your laptop computer gets stolen. Encrypting the partitions is also not that straightforward, so it’s better to be familiar with the techniques before trying to do them.
I plan to write about dual boot methods later on, but only after I’ve told you about all the precautions you need to take, especially if you’re dealing with Windows 11.
1. Windows 10 / 11
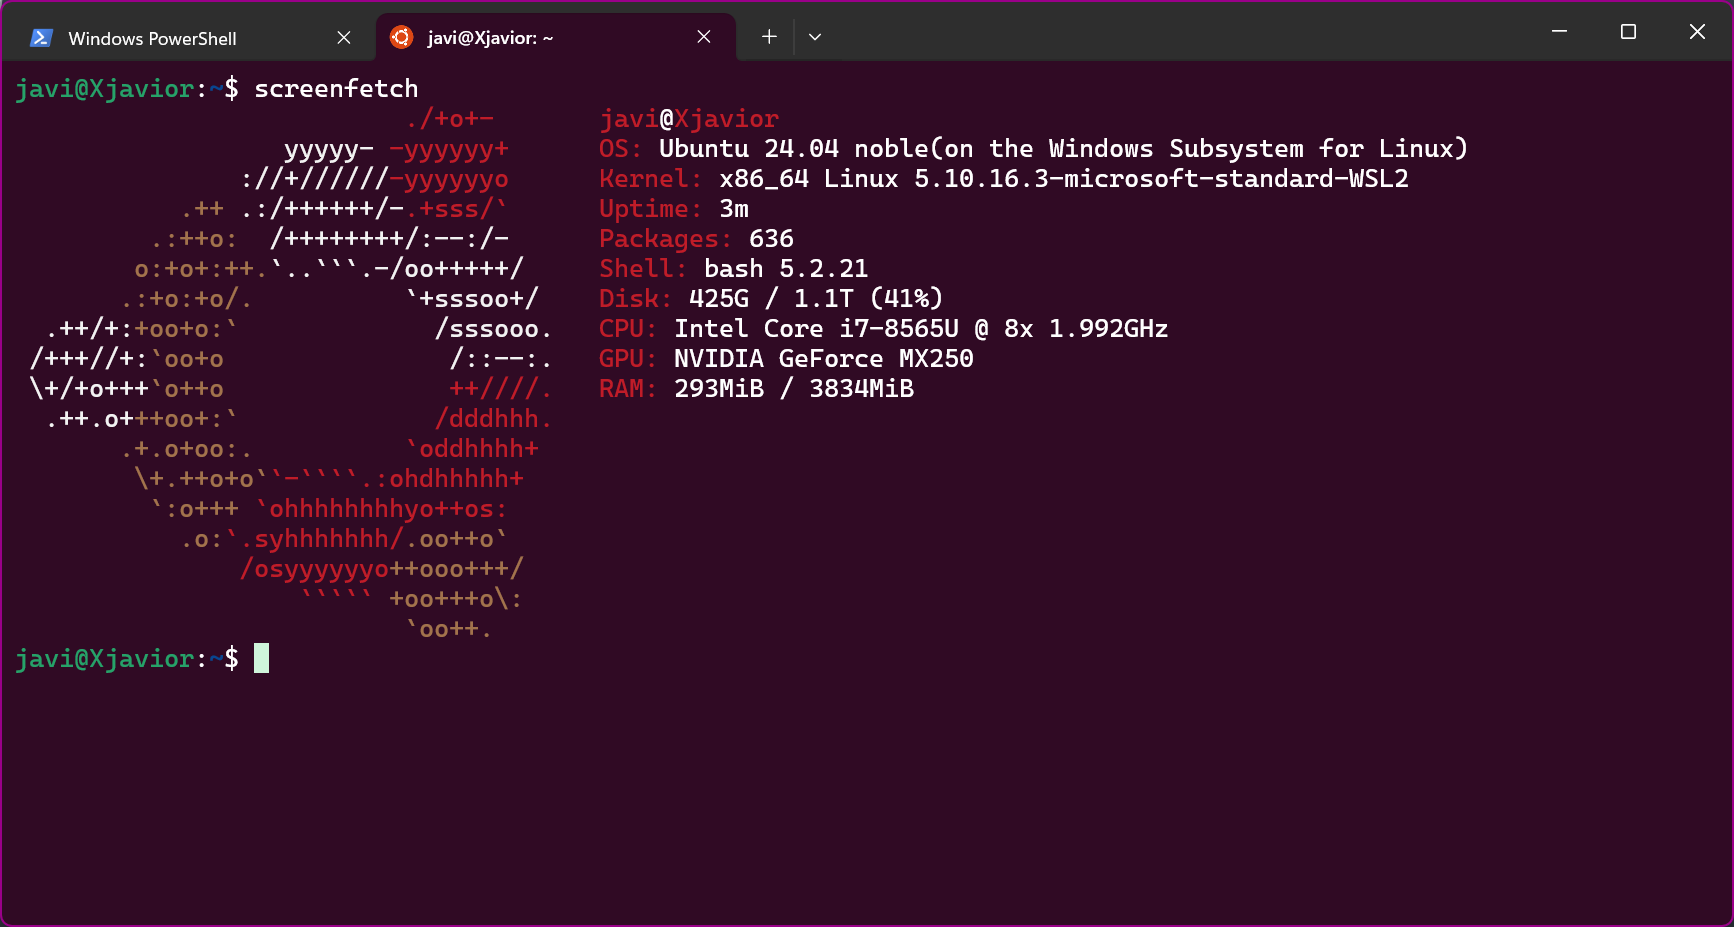
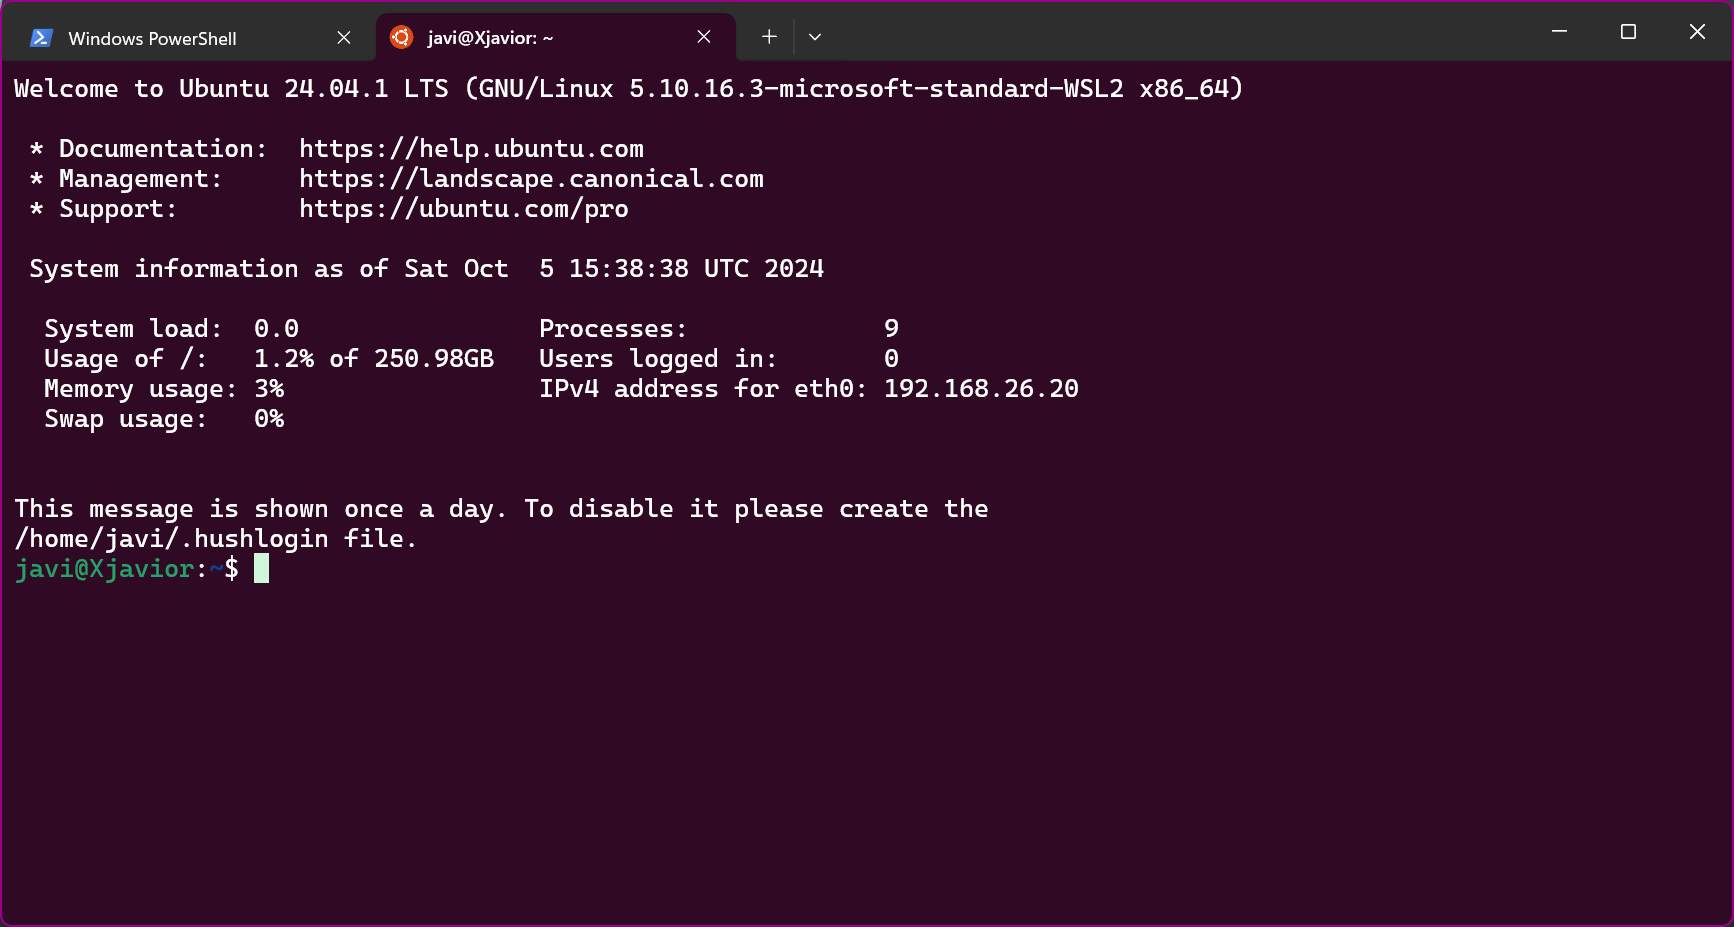
Ubuntu running on WSL
Let’s talk about how you can install & try out Linux on Windows. You have 2 options:
WSL (Windows 10 or 11 all editions)
Microsoft Hyper-V (Windows 10 or 11 Pro/Enterprise/Education/Server).
1. WSL (Windows 10 or 11)
WSL is a relatively new and easy way to get started with Linux on your systems. It’s a Type-1 VM, which means it’s very efficient and uses minimal system resources. It’s also very easy to install and use, as you’ll find out soon. Let’s get started!
Check your system: You require atleast Windows 10 version 2004 and higher (Build 19041 and higher) or Windows. Click on Ctrl + R, then enter ‘winver’ to check your Windows version.
Check Windows version
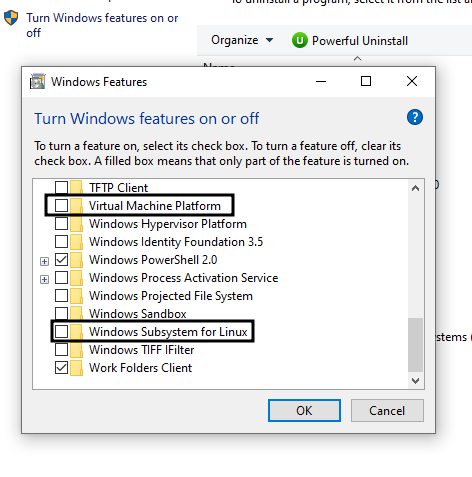
Now go to Control Panel > Programs (or Programs & Features) > Turn Windows features on or off > Tick Virtual Machine Platform and Windows Subsystem for Linux.
Tick these boxes
Since WSL 2 introduced a lot of improvements over WSL 1, you need to manually install the Linux kernel update package. Download it from here. (Official Microsoft article: link).
Now you need to make a choice of Linux distribution. I recommend a few options:
Ubuntu: Ubuntu will give you a good base with a lot of the regularly used command-line software already installed. Choose this if you don’t mind a larger package size for immediate functionality.
Debian: Choose this if you want a minimal Linux system, with only the essential software installed. You may have to install a lot of packages you need manually, but it will be a great learning experience.
Kali Linux: This is a Linux distribution focused on Ethical Hacking and Penetration Testing. The WSL version has all the standard tools available on the regular build. Choose this if you want such kind of software.
Head over to the Microsoft Store and download the distribution you want. I’ve chosen Ubuntu for the purpose of this blog.
If you’re an absolute beginner, Ubuntu is a good place to start. Just make sure you download ‘Ubuntu’ and not ‘Ubuntu 20.04 LTS’ or similar, the former will give up the latest LTS release and keep it updated.
Once it is installed, Ubuntu will be available in the application list on your Start Menu. Just run it and wait for the installation process to complete.
Now you will be prompted to set your username and password.
Username: Can be anything, just make sure it’s in lowercase. It doesn’t need to match your Windows username.
Password: Can be anything, doesn’t have to match your Windows password.
Set your username & password. Image taken from here.
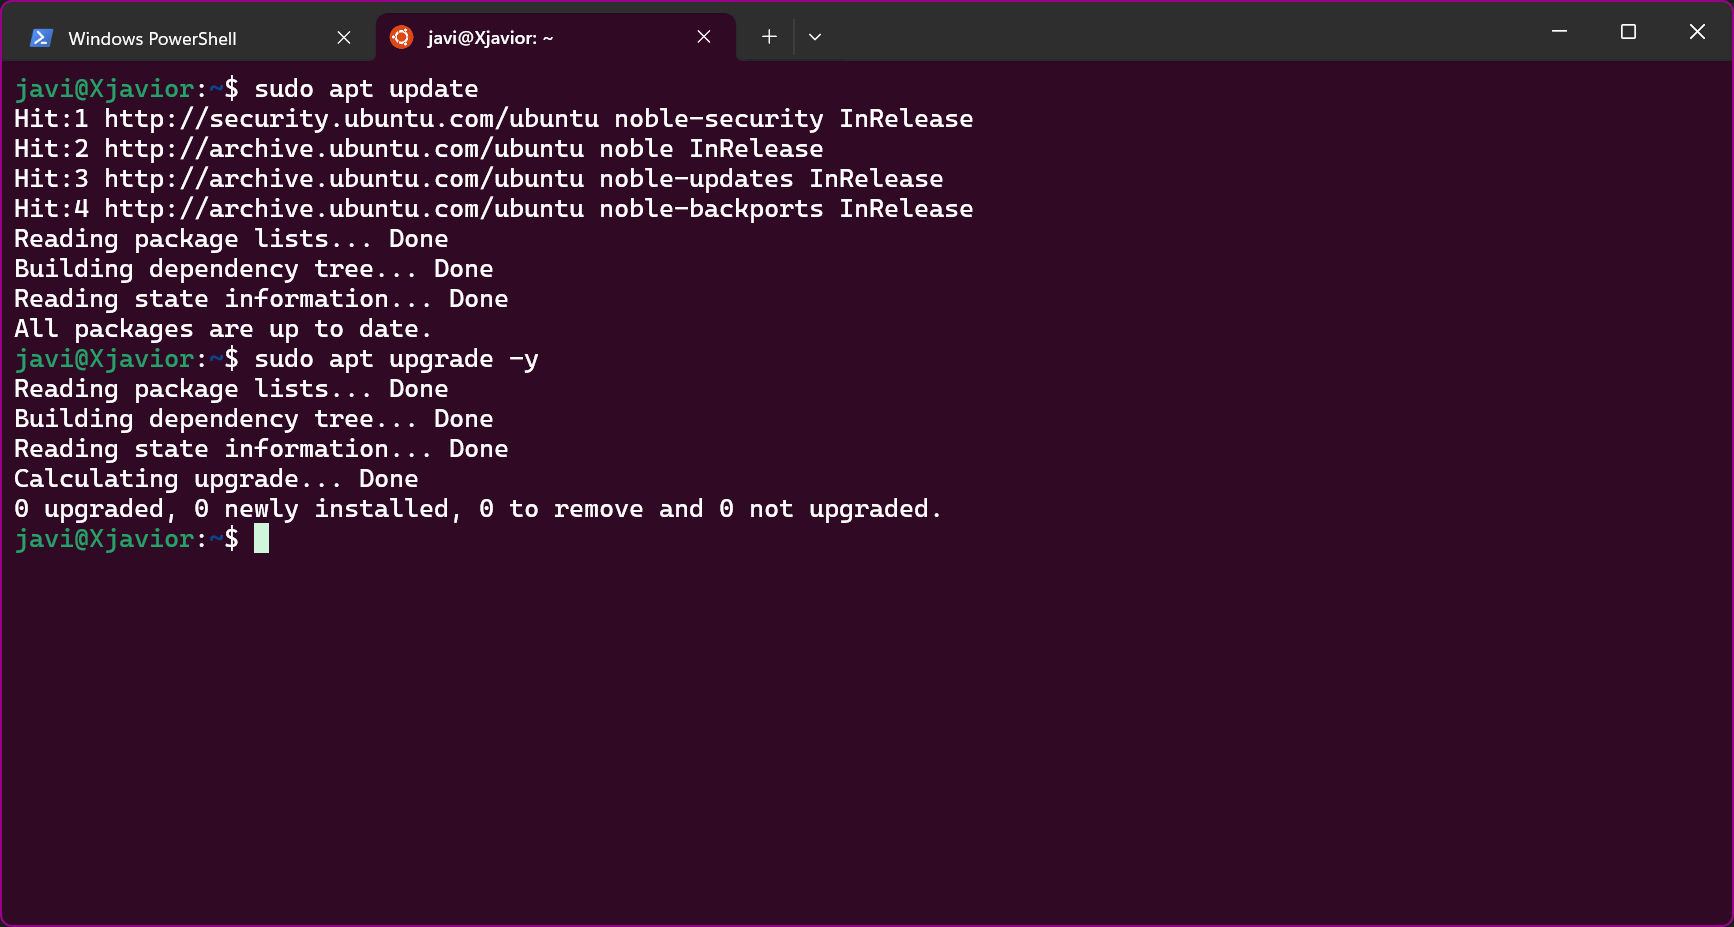
Once you set it up, you’re in your brand-new Linux system! You just need to perform one last step, i.e. update the software. Run these commands (-y assumes yes to all queries):
$ sudo apt update
$ sudo apt upgrade -y
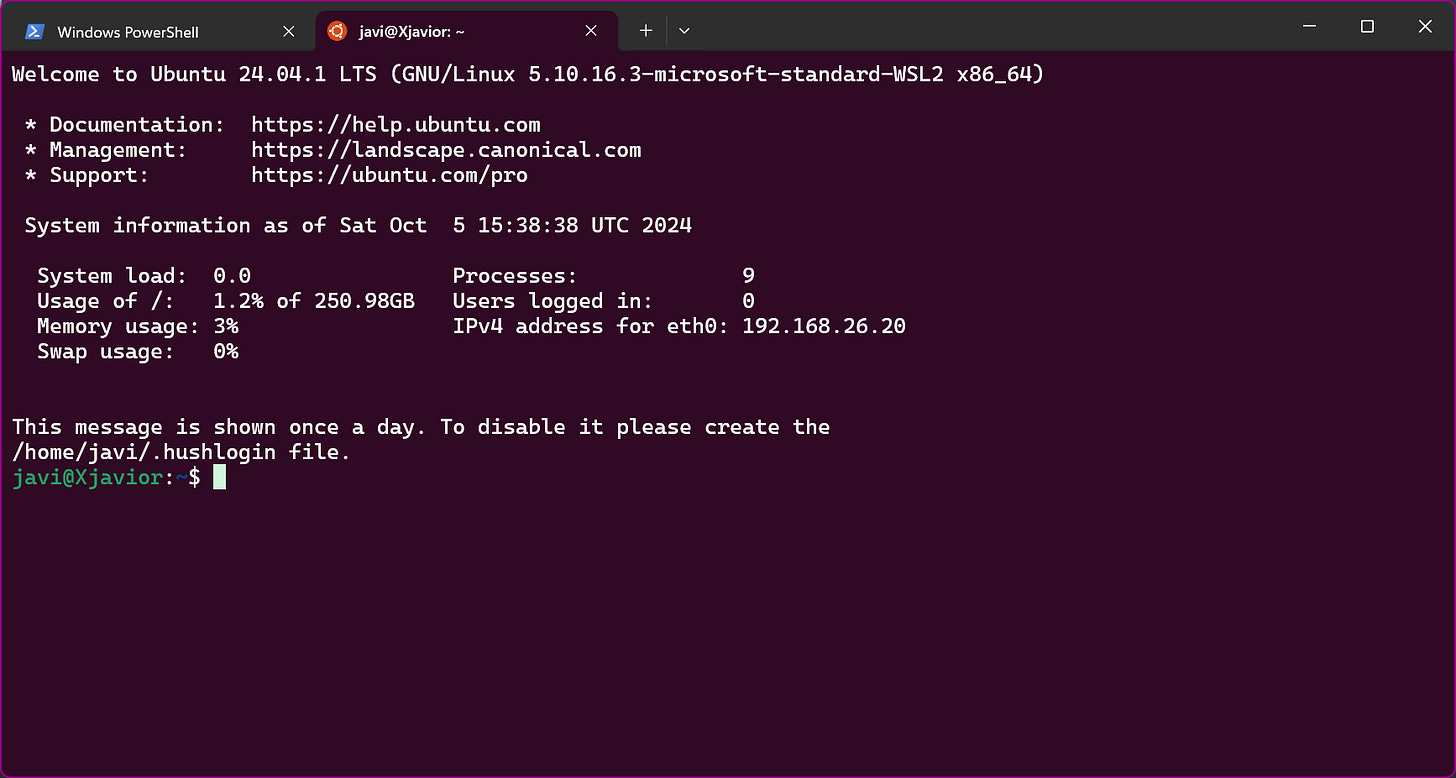
Congratulations! You’re on your Linux terminal!
Ubuntu WSL: Initial Screen
That’s all the setup you need for WSL. You can even link software like Visual Studio Code with it, but that’s a topic for another day 😊
2. Microsoft Hyper-V (Windows 10 or 11 Pro/Enterprise/Education/Server)
Microsoft Hyper-V is a powerful virtualization platform that allows users to create and manage virtual machines (VMs) on Windows systems. It’s also a Type-1 Hypervisor, which means it’s very efficient at running your virtual machines.
Using Hyper-V for virtualizing Linux is just one of the ways it can be used. You can think of this software like VMware Workstation or Oracle VirtualBox, but more efficient and integrated with Windows. You can virtualize pretty much anything with this tool!
READ ME: IMPORTANT
Microsoft Hyper-V is not available on Windows 10 / 11 Home. So, our first step is to check if our system will even support it:
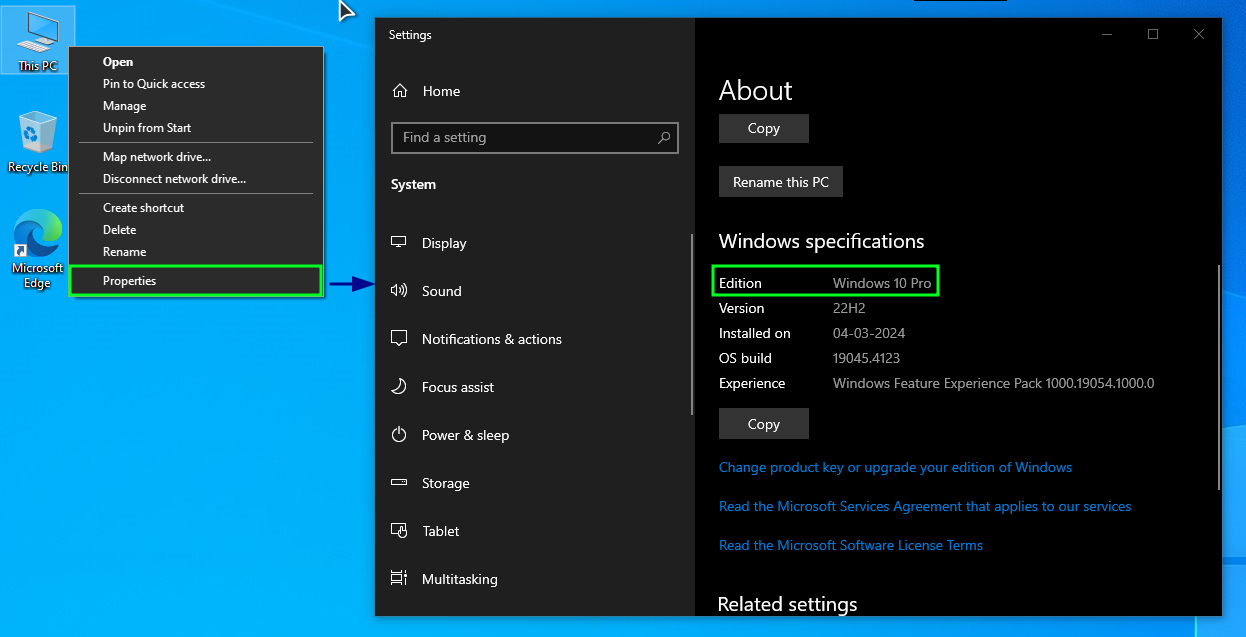
Click on This PC on your desktop (or search for it on Start Menu), right click, then select Properties.
Scroll Down. You should see the Windows version you have.
About PC
If you have Windows 10 or 11 Pro/Enterprise/Education/Server, you’re good to go! If not, then you cannot use Hyper-V, so feel free to skip this part.
Once you’ve determined if your system supports Hyper-V, we can proceed to the next steps.
Note: I’ll be installing Ubuntu Server here, to maintain the consistency of the article and provide you with the same terminal environment.
Download the LTS version of Ubuntu Server from here.
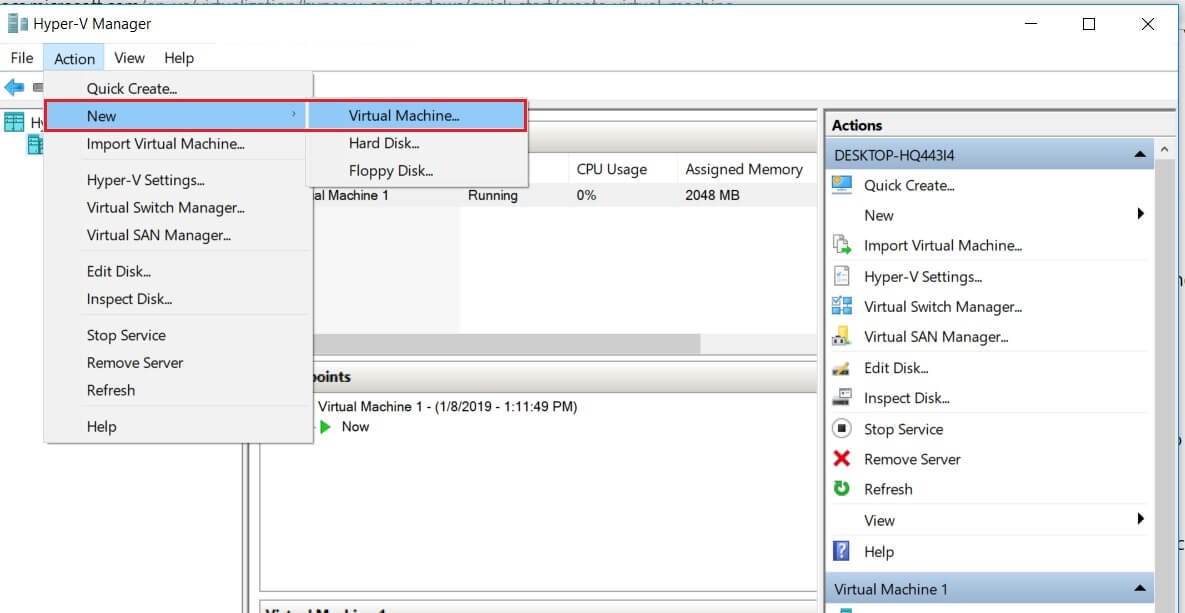
Open Hyper-V Manager: It’s under Start Menu > All Apps > Windows Administrative Tools, or just search for it in the apps list.
Go to Action > New > Virtual Machine…
Hyper-V Manager
The New Virtual Machine wizard will open. Follow the on-screen prompts. I recommend using:
Specify Name and Location: your choice
Specify Generation: 2
Assign Memory: 1024MB (1GB), ✅ Use Dynamic Memory
Configure Networking: Internet
Connect Virtual Hard Disk: Create a virtual hark disk, name is your choice, size at-least 8GB.
Installation Options: Select a bootable image file → select the downloaded Ubuntu Server ISO.
Now, you will see an entry for the new virtual machine you just created. Right-click on it, and click `Connect`.
Click on `Start` in the prompt, or the green power icon in the toolbar, to start the VM. Follow the on-screen prompts to finish setup.
Network Connections: Select eth0 → Edit IPv4 → Automatic (DHCP). That should give you access to the Internet.
Configure proxy: leave empty.
Guided storage configuration:
✅ Use an entire disk
❎ Setup this disk as an LVM group
Profile setup:
Username: Can be anything, just make sure it’s in lowercase. It doesn’t need to match your Windows username.
Password: Can be anything, doesn’t have to match your Windows password.
Upgrade to Ubuntu Pro: ✅ Skip for now
SSH Setup: leave empty, unless you know what SSH is and want to use it.
Featured server snaps: your choice
The installation will take some time. Sit back and relax! At the end, it’ll ask you to reboot. Click `Reboot now.
That’s it! After a reboot, enter your username & password.
Congratulations! You’re on your Linux terminal!
Conclusion
This is all I have for this week. In case you’re wondering why I didn’t talk about VMware or Oracle VirtualBox, they’re scheduled for the next article.
Until next time, this is me signing off. Happy Learning!


